
Yii2 มี extension user อยู่หลายตัวเหมือนกัน แต่ที่ผมชอบและคิดว่าต่อเติมได้ง่ายที่สุด คือ dektrium/yii2-user เพราะสามารถ custom layout ได้เอง override พวก controller,model ได้ และตัวจัดการ user ค่อยข้างเข้าใจง่าย
โดยขั้นตอนการติดตั้งมีดังนี้
- ติดตั้งผ่าน composer
- ตั้งค่า Config
- นำเข้าฐานข้อมูล
- ตั้งค่าเมนู
- ลงทะเบียน User เพื่อเข้าใช้งาน
- login
การติดตั้ง
composer require "dektrium/yii2-user:0.9.*@dev"
ตั้งค่า
เปิดใช้งาน module user และ components user
- basic แก้ไขไฟล์ที่
config/web.php - advance
frontend/config/main.php - advance
backend/config/main.php
<?php

$params = require(__DIR__ . '/params.php');

$config = [
//...
'components' => [
 'user' => [
            //'identityClass' => 'app\models\User',
            'identityClass' => 'dektrium\user\models\User',
            'enableAutoLogin' => true,
 ],
 // ...
],
'modules' => [
    'user' => [
        'class' => 'dektrium\user\Module',
        'enableUnconfirmedLogin' => true,
        'confirmWithin' => 21600,
        'cost' => 12,
        'admins' => ['admin']
    ],
    //...
],
หากคุณเปิดใช้งาน PrettyUrl ให้เพิ่ม
ruleสำหรับการใช้งาน module ที่ config ด้วยครับ
'<module:\w+>/<controller:\w+>/<action:\w+>' => '<module>/<controller>/<action>',
โค้ดเมื่อเพิ่มเข้าไป
<?php

$params = require(__DIR__ . '/params.php');

$config = [
//...
     'urlManager' => [
               'class' => 'yii\web\UrlManager',
               // Disable index.php
               'showScriptName' => false,
               // Disable r= routes
               'enablePrettyUrl' => true,
               'rules' => [
                       '<controller:\w+>/<id:\d+>' => '<controller>/view',
                       '<controller:\w+>/<action:\w+>/<id:\d+>' => '<controller>/<action>',
                       '<controller:\w+>/<action:\w+>' => '<controller>/<action>',
                       ['class' => 'yii\rest\UrlRule', 'controller' => 'location', 'except' => ['delete','GET', 'HEAD','POST','OPTIONS'], 'pluralize'=>false],
                       '<module:\w+>/<controller:\w+>/<action:\w+>' => '<module>/<controller>/<action>',
               ],
    ],
//...
]
นำเข้าข้อมูลโดยใช้ Migrate
หารใครที่รันคำสั่ง
yii migrateไปแล้วในตอนติดตั้ง advance ให้เราเปลี่ยนชื่อตารางuserเป็นชื่ออื่นก่อนนะครับ หรือคิดว่าไม่ได้ใช้แล้วก็สามารถลบออกได้เลย แล้วหลังจากนั้นค่อย install ตามคำสั่งด้านล่าง
php yii migrate/up --migrationPath=@vendor/dektrium/yii2-user/migrations
หากรันคำสั่งแล้วพบ error
Exception 'yii\db\Exception' with message 'SQLSTATE[HY000] [2002] Can't connect to local MySQL server through socket '/Applications/MAMP/tmp/mysql/mysql.sock' (2)'
ให้ลองเปลี่ยนการตั้งค่าฐานข้อมูล จาก localhost เป็น 127.0.0.1 หรือเป็น ip database ของคุณ
หากไม่มีปัญหาเราจะพบกับหน้าจอยืนยันการสร้างตารางด้านล่าง
Yii Migration Tool (based on Yii v2.0.4)

Total 7 new migrations to be applied:
    m140209_132017_init
    m140403_174025_create_account_table
    m140504_113157_update_tables
    m140504_130429_create_token_table
    m140830_171933_fix_ip_field
    m140830_172703_change_account_table_name
    m141222_110026_update_ip_field

Apply the above migrations? (yes|no) [no]:
ให้ทำการตอบ yes หลังจากนั้น yii-user จะสร้างตางรางให้เราสามารถตรวจสอบที่ฐานของคุณได้
*** applying m140209_132017_init
    > create table  ... done (time: 0.056s)
    > create unique index user_unique_username on  (username) ... done (time: 0.047s)
    > create unique index user_unique_email on  (email) ... done (time: 0.035s)
    > create unique index user_confirmation on  (id, confirmation_token) ... done (time: 0.066s)
    > create unique index user_recovery on  (id, recovery_token) ... done (time: 0.033s)
    > create table  ... done (time: 0.023s)
    > add foreign key fk_user_profile:  (user_id) references  (id) ... done (time: 0.015s)
*** applied m140209_132017_init (time: 0.288s)

*** applying m140403_174025_create_account_table
    > create table  ... done (time: 0.028s)
    > create unique index account_unique on  (provider,client_id) ... done (time: 0.018s)
    > add foreign key fk_user_account:  (user_id) references  (id) ... done (time: 0.023s)
*** applied m140403_174025_create_account_table (time: 0.072s)

*** applying m140504_113157_update_tables
    > drop index user_confirmation ... done (time: 0.029s)
    > drop index user_recovery ... done (time: 0.010s)
    > drop column confirmation_token from table  ... done (time: 0.040s)
    > drop column confirmation_sent_at from table  ... done (time: 0.054s)
    > drop column recovery_token from table  ... done (time: 0.040s)
    > drop column recovery_sent_at from table  ... done (time: 0.036s)
    > drop column logged_in_from from table  ... done (time: 0.040s)
    > drop column logged_in_at from table  ... done (time: 0.040s)
    > rename column registered_from in table  to registration_ip ... done (time: 0.021s)
    > add column flags integer NOT NULL DEFAULT 0 to table  ... done (time: 0.043s)
    > rename column properties in table  to data ... done (time: 0.017s)
*** applied m140504_113157_update_tables (time: 0.373s)

*** applying m140504_130429_create_token_table
    > create table  ... done (time: 0.027s)
    > create unique index token_unique on  (user_id,code,type) ... done (time: 0.018s)
    > add foreign key fk_user_token:  (user_id) references  (id) ... done (time: 0.051s)
*** applied m140504_130429_create_token_table (time: 0.098s)

*** applying m140830_171933_fix_ip_field
    > alter column registration_ip in table  to bigint ... done (time: 0.033s)
*** applied m140830_171933_fix_ip_field (time: 0.038s)

*** applying m140830_172703_change_account_table_name
    > rename table  to  ... done (time: 0.024s)
*** applied m140830_172703_change_account_table_name (time: 0.027s)

*** applying m141222_110026_update_ip_field
    > alter column registration_ip in table  to string(45) ... done (time: 0.036s)
*** applied m141222_110026_update_ip_field (time: 0.041s)


Migrated up successfully.
จากนั้น yii-user จะสร้างตางรางให้เรา สามารถตรวจสอบที่ฐานของคุณได้
การตั้งค่าเมนู
ให้ทำการเพิ่มเมนูสำหรับ login,logout และเมนูอื่นๆ ที่ layout/main.php ที่ Nav::widget ในส่วนของ items เพิ่มเติมเข้าไป
Yii::$app->user->isGuest ?
['label' => 'Sign in', 'url' => ['/user/security/login']] :
['label' => 'Account(' . Yii::$app->user->identity->username . ')', 'items'=>[
    ['label' => 'Profile', 'url' => ['/user/settings/profile']],
    ['label' => 'Account', 'url' => ['/user/settings/account']],
    ['label' => 'Logout', 'url' => ['/user/security/logout'],'linkOptions' => ['data-method' => 'post']],
]],
['label' => 'Register', 'url' => ['/user/registration/register'], 'visible' => Yii::$app->user->isGuest],
รายการเมนูอื่นๆ ที่สามารถใช้งานได้
/user/registration/registerหน้าสมัครสมาชิก/user/registration/resendหน้าส่งอีเมล์ยืนยันใหม่อีกรอบ หากไม่ได้รับ/user/registration/confirmหน้า link เมื่อคลิก confirm อีเมล์เพื่อยันยันการสมัครสมาชิก (requires id and token query params)/user/security/loginหน้าล็อคอิน/user/security/logoutหน้าล็อกเอาท์ (available only via POST method)/user/recovery/requestหน้าจอกู้รหัสผ่าน โดยกรอกอีเมล์ที่เคยลงทะเบียนไว้/user/recovery/resetหน้าจอเปลี่ยนรหัสผ่านหลังจากได้รับอีเมล์กู้รหัสผ่าน (requires id and token query params)/user/settings/profileหน้าจอโปรไฟล์ user/user/settings/accountหน้าจอตั้งค่า (email, username, password)/user/settings/networksหน้าจอแสดงรายการ login ผ่าน social/user/profile/showหน้าจอแสดงข้อมูลรายละเอียด user (requires id query param)/user/admin/indexหน้าจอจัดการข้อมูล user
การใช้งาน
ให้ทำการ register ก่อน เพราะระบบจะไม่มีข้อมูล user มาให้เลย ต้อง register
ในส่วนของ module user เราจะทำการตั้งค่า
'enableUnconfirmedLogin' => falseเพื่อให้ไม่ต้องยืนยันอีเมล์หลังสมัครสมาชิก เพื่อลงทะเบียนในครั้งแรกก่อน
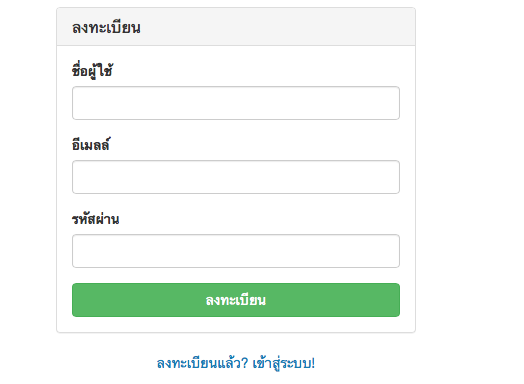
ลงทะเบียนเสร็จให้ทำการ login
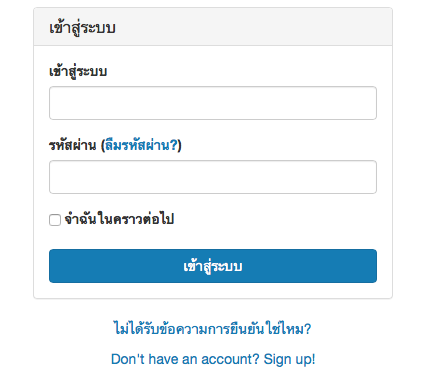
เมื่อ login เสร็จจะพบเมนู

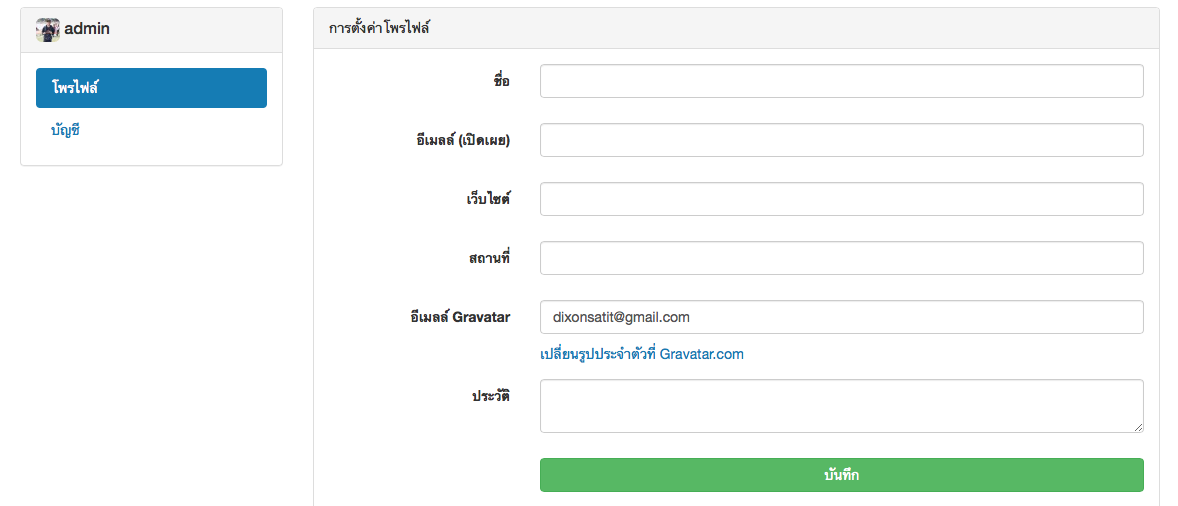
หน้าจอ โปรไฟล์
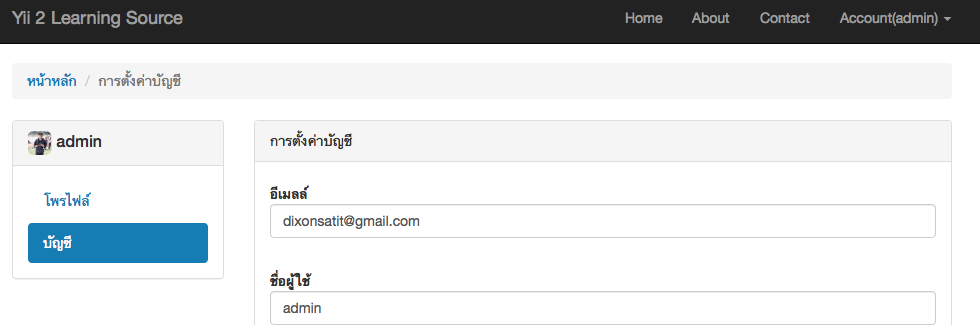
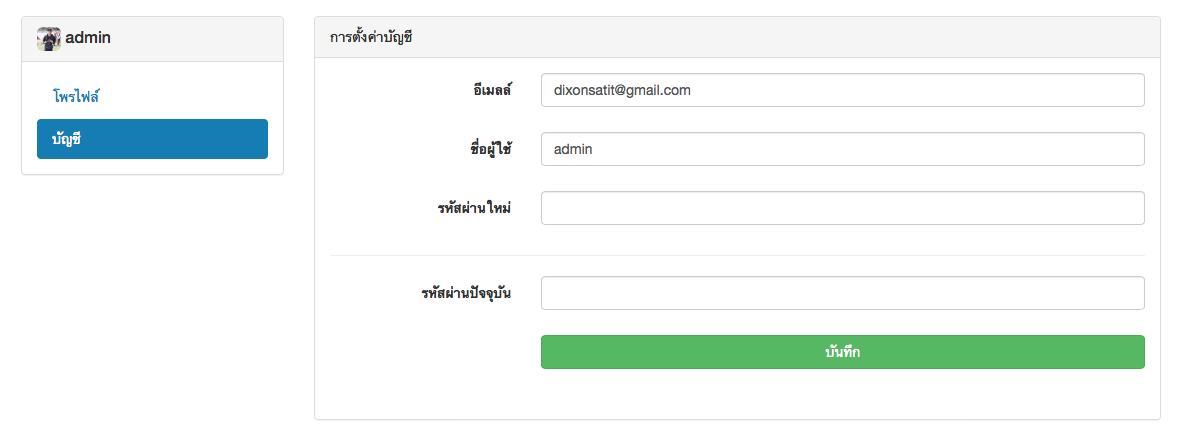
หน้าจอ account
น่าจะพอช่วยให้การติดตั้ง yii-user ง่ายขึ้นนะครับ ^ ^